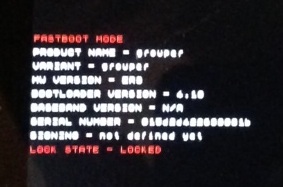
Fastboot Mode — helpfully rendered in illegibly small type
Now (assuming your Android SDK is where you I told you to put it), launch terminal and enter /android-sdk/tools/android. This will launch a butt-ugly Java application. Check the box next to Android SDK Platform Tools and click the Install packages… button. When that's done, quit the app.
Next, in terminal enter cd ~/Desktop/Nex and hit TAB (it should autocomplete the name of the factory image directory).
Now, enter /android-sdk/platform-tools/fastboot devices and press enter. It should list attached Android devices, in particular your Nexus 7 (along with some funky number).
Now, press up arrow and then replace devices with erase boot and hit enter. Repeat with cache, recovery, system, and userdata. You may get some funky messages such as "are you sure you don't want to partition". Unless you get an actual failure or error message you should successfully have deleted all your precious data.
Now, and this is the step missing from the instructions I eventually followed, you may need to unlock your bootloader. Hit up arrow and replace erase userdata with oem unlock. (Don't worry, you can undo this later if you want to go back in the walled garden.)
Next, hit up arrow again -w update imag and then hit TAB (to autocomplete the name of the image file you're going to flash onto the device).
At this point I think my device booted itself, but if not you may need to continue:
Now, hit up arrow again and …fastboot reboot bootloader followed by …fastboot reboot
You may want to return to the fastboot screen and use …/fastboot oem lock to return to the walled garden.
That's it. I hope this saves someone the problems I had.